Showing posts with label HTV. Show all posts

October 8, 2011

doggy contest!!

in the newsletter last week there was this announcement...


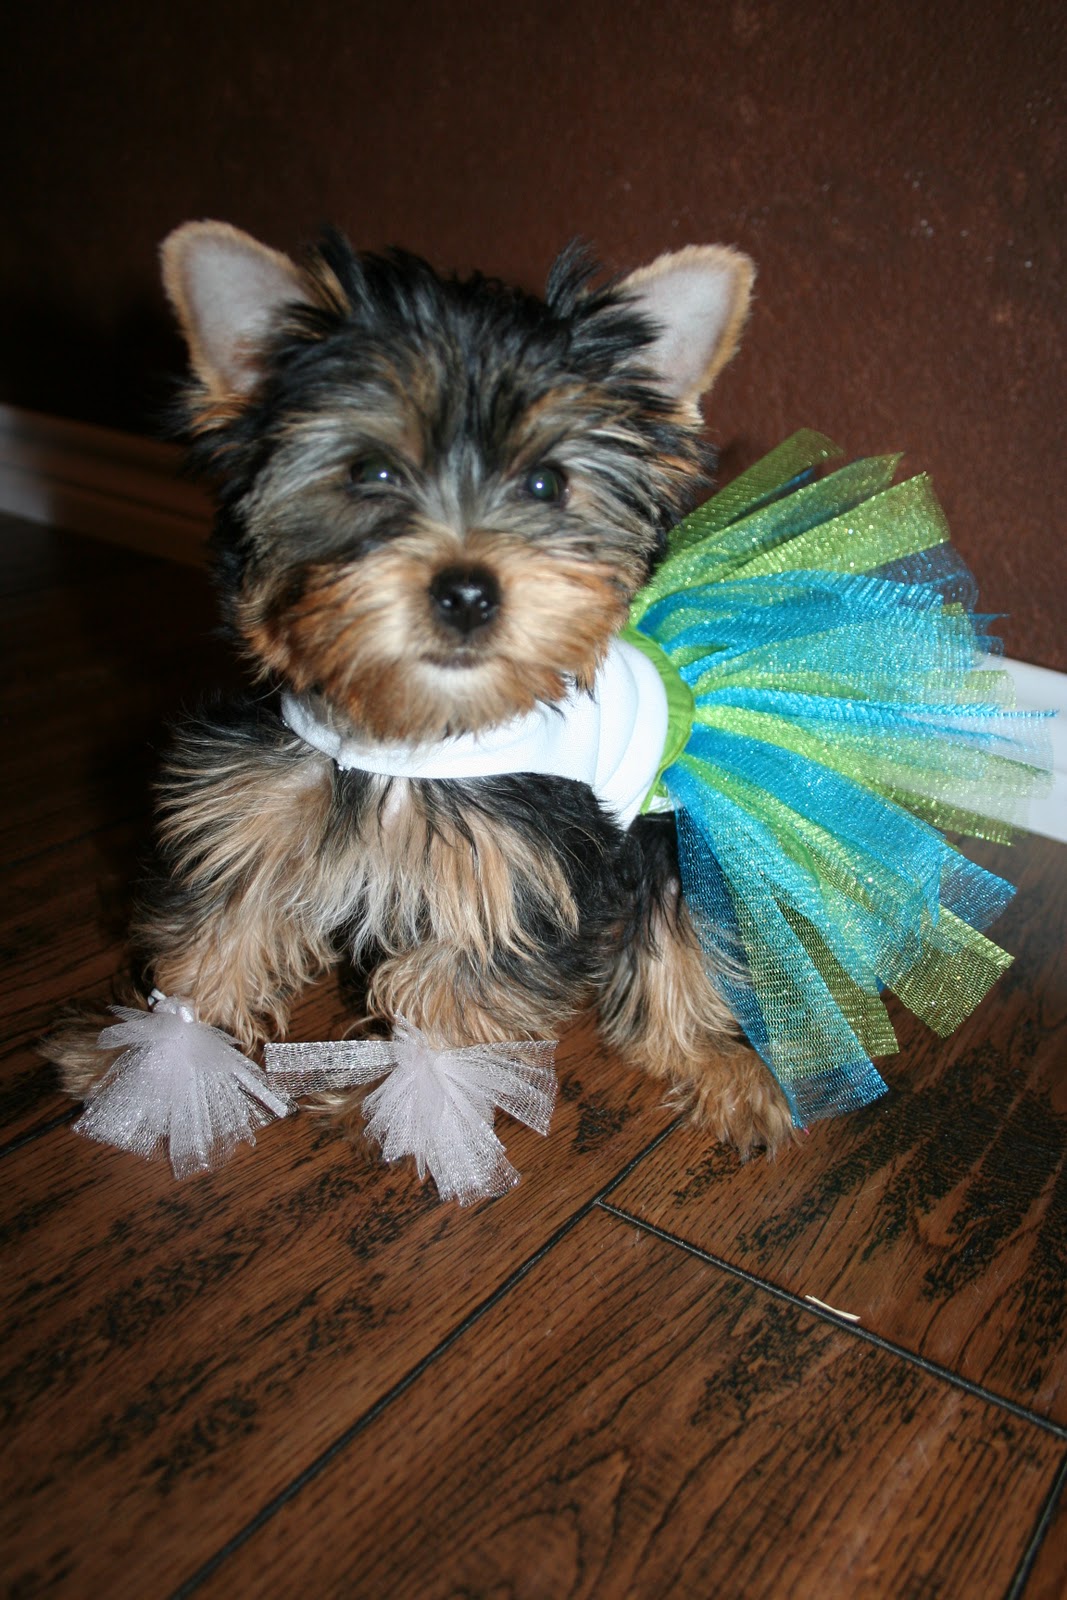
oh, it is so on!! i have to remind myself  that it's just a friendly contest, to have fun!! yeah right, i'm out to win. AND we have special arsenal in our corner... a new yorkie puppy. those things by themselves are cute, imagine with a little creativity what we could do! we chose most school spirited and our little bit is going to be head cheerleader!

we started her costume off with her skirt. what cheer puppy is complete without her tutu uniform?


here's my supplies. i originally got green material to make her shirt and then realized i needed it to stretch and ended up using a t shirt sleeve for the shirt instead. first i measured her little waist and cut my elastic strip 1 in less than her waist.


next i cut 1 & 1/2 in strips twice the length of how long i wanted the skirt to be. 


after i got miss thang's strips all cut i started putting them on the elastic. * now let me interject here. there are multiple ways and 5 million tutorials on how to do this. i looked at a couple different ways and decided to do a little unconventional method since it will be going on my little 3lb puppy. i doubled over a couple sections at a time and sewed them around the elastic. 


now again i chose to sew it instead of tying just because i thought with as little as it was going to be it would bunch too bad for her. i knew she wasn't going to be happy about it already so i was trying to make it as painless as possible for the both of us. be very careful when sewing the tule, for starters it is very delicate and will tear easy but also be careful that you are just sewing the tule to the tule and not the tule to the elastic. if it is sewn into the elastic, when the elastic stretches it will break what you have sewn. 


i kept adding until i ran out. at first i was bummed because it only went half way around but i've since realized that since this is going on a dog that is really for the better. 


i really wanted it to be comfortable for her so i sewed so material around the edge of the tule so that the waist wouldn't irritate her. 


now on to her shirt!

i used the sleeve from an old white shirt to make her shirt.


i trimmed up the edges of the shirt then hemmed around them to prevent raveling. i then turned inside out and put it on her to mark where her legs would be.


next i found a circle about the size i wanted for leg holes and drew on circles to cut out. 


after i got the holes for her legs i tried it one her and had to do a little more taking up. but then got it perfect. now for some school pride. i used MTC to pixel trace our new school logo and printed out on some HTV.


so now our uniform is done, but we are still not finished. no cheerleader can cheer without her pom poms! the only part i really hate about this is that i used all my green and blue. oh well. at least i still had some white left. 


i took about 6 strips of my white tule that i had left over and 2 rubber bands. i tied a strip of tule around the rubber band like so...


i tied about 4 more around in different directions...


now i wanted them to stick out in front like pom poms so i pulled my pieces of tule together and tied one last piece around them to keep them bunched together. 


and here's her outfit...


ok so now to get it on her. she is such the little model!


we got  her pics turned in and can't wait to see if she's won!


teacher chair cover tutorial

my aunt asked me to help her with some covers to place over the backs of the chairs in her classroom to show the student of the day. she had made some last year from reusable bags she got at the dollar store and wrote on them with sharpie. she wanted something different this year and asked if i could help her with it. of course i would! and miss a chance to play?!?!? she wanted one boy and one girl student each day and also a cover for birthdays. with the theme in her room being bees she asked for them to be king bee, queen bee, and birthday bee. i set to work. i got some canvas from joann's, she needed something thick and durable as well as washable. i got some bright cheerful pink and blue. i used her original one as my pattern since i knew that those fit the chairs. i cut out a piece for the front and back and about a 2 in strip the length for the sides.


i sewed one strip to each side and then repeated for the second panel so my "bag" now looked like this...

next i measured out about a 2 in strip the length of the bag for the top. i sewed the two ends together to what would be the sides of the bag then came back and sewed the top to the front and back panels.


to clean up the bottom edge i folded over and hemmed it up


AND because i'm a good little ocd girl that refuses she has any sort of problem i ironed out all the seams so that they would lay flat. : ) here's my bag...

so now for some HTV fun. after searching all thru google i found my king bee, queen bee, and birthday bee images that i wanted to use. i pixel traced them into MTC and layered out each color. i cut out the different pieces and ironed them onto my bags. of course, no king or queen would be complete without some jewels, so bling was added. here's my finished project with aunt candy's from last year...


i can't wait to see them on the kids chairs!! she is picking them up sun. can't wait to see them in use.

July 29, 2011

it's hard being a diva, doggy dress

i found this blog and this diy craft and couldn't wait to get started for my favorite little niece hershey and adopted niece diva. the name of the blog is sew doggy style and you can click here to she her post. here's how i made their dresses...


my materials i used was an old jean pocket, some cow print material, some pink tulle, black ribbon (i ended up not actually using the black ribbon but just the pink instead.) and some hot pink ribbon. the first step is to gather your material to fit the pocket. in order to do this you need to cut your material about 2 and 1/2 times larger than your finished result.


 i measured from here to here and got 4 in. so i cut my material 10 in. from here you have to gather your material to do this you will need to a 1/2 in seam across the top leaving a good amount of string on either end. very import not to back stick here...


after you have your 1/2 in seam time to sew a 1/4 in seam across the top as well, and again to do not back stitch on either end. once you have both seams sewn, tie one end of the strings together to keep from pulling the thread out. with the other end pull the top string along, much like you would a curtain rod, and bunch or gather the material.


the next step you will need to do is hem the edges to prevent raveling. before you sew the edges line up your gathered material to your pocket to assure it's the right size.


i pressed the edges first...

and then sewed a 1/4 in seam..

then repeat for the bottom edge. when finished the back should look like this...


next do the same thing with tulle. be careful with the tulle, it is delicate and will rip easily. the tulle doesn't need to be hemmed just gathered.


after i lined up the tulle and cow print


i placed the pocket on top and then sewed the three pieces together. i used thread about the same color as the thread used on the pocket, a light brown color.


after the three pieces are sewn together the dress comes together like so...


after the top of the dress is together it's time to make the body of the dress. to do this you will need to measure around body of your dog to determine the size of material to cut. i used scraps from an old shirt i used with another project. i like the t shirt material because it stretches.


after you cut your material it's time to sew it onto the pocket


i placed it on the pocket down from the top seam some. i sewed one side and then the next.


next i cut the ribbon to attach for around the neck.


i sewed the ribbon to the top and the dress is done. well..... ok it's done unless you like me need some need some bling! :)


i had to make a diva dress for my favorite little diva so that's what i did. i cut my words and shadow out of HTV on make the cut then placed them onto the pocket.


after cutting out the shadow layer and the top layer it's time to iron it on. place the shadow layer down and something on top to protect from heat such as a teflon sheet. iron about 8-10 sec.


pull the off the shinny top layer of the HTV and re-iron the HTV with the protective layer. after you have re-ironed line up your top layer repeat the process.


NOW it's time for the bling!! :)


i use fabric glue to place my stones.


and after you add the bling.... ta da you're done! :)


baby girl diva...
and sweet hershey...